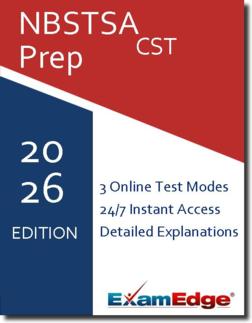
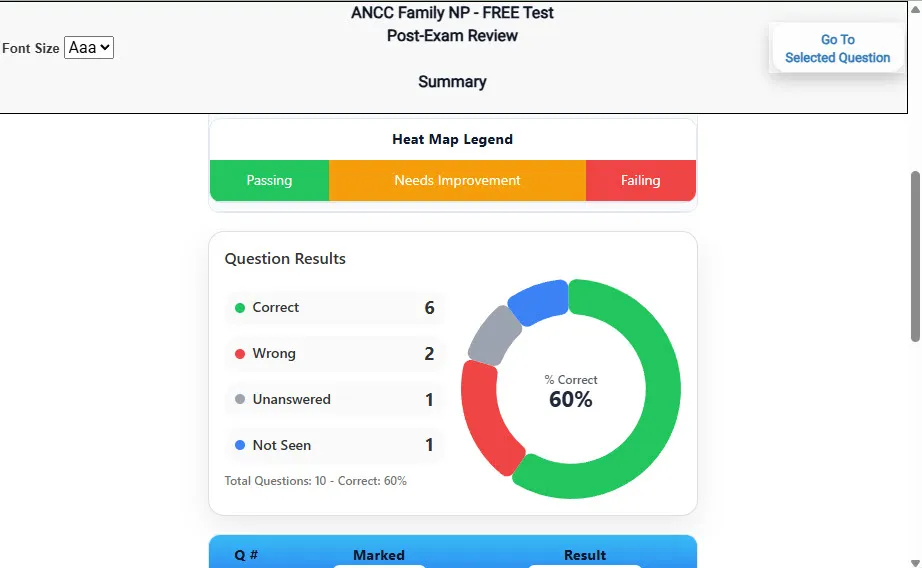
Answer Question Screen
- Clean multiple-choice interface with progress bar.
- Mark for review feature.
- Matches real test pacing.

** All Prices are in US Dollars (USD) **
Understanding the exact breakdown of the NBSTSA Certified Surgical Technologist test will help you know what to expect and how to most effectively prepare. The NBSTSA Certified Surgical Technologist has 150 multiple-choice questions . The exam will be broken down into the sections below:
| NBSTSA Certified Surgical Technologist Exam Blueprint | |||
|---|---|---|---|
| Domain Name | |||
| Perioperative Care: | |||
| Preoperative Preparation | |||
| Intraoperative Procedures | |||
| Postoperative Procedures | |||
| Additional Duties | |||
| Administrative and Personnel | |||
| Equipment Sterilization and Maintenance | |||
| Basic Science | |||
| Anatomy and Physiology | |||
| Microbiology | |||
| Surgical Pharmacology | |||
Everything you need to prepare with confidence—without wasting a minute.
Timed, No Time Limit, or Explanation mode.
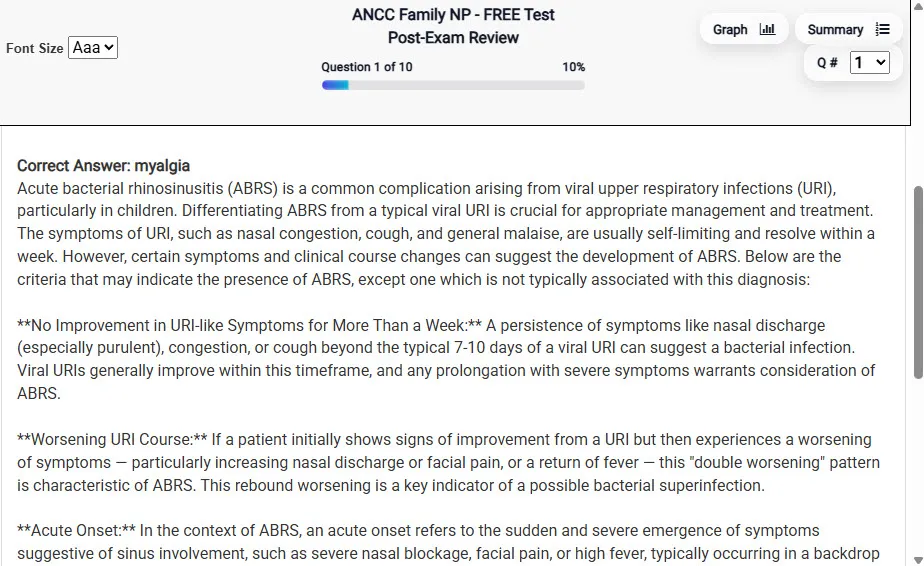
Heatmaps and scaled scores highlight weak areas.
Concise explanations emphasize key concepts.
Matches the feel of the actual exam environment.
Clean layout reduces cognitive load.
Web-based access 24/7 on any device.
Our practice tests are built specifically for the NBSTSA CST exam — every question mirrors the real topics, format, and difficulty so you're studying exactly what matters.
We match the per-question time limits and pressure of the actual NBSTSA exam, so test day feels familiar and stress-free.
You'll have more than enough material to master every NBSTSA CST concept — no repeats, no fluff.
Ordering 5 practice exams costs less than retaking the NBSTSA Certified Surgical Technologist exam after a failure. One low fee could save you both time and money.
Need to step away mid-exam? Pick up right where you left off — with your remaining time intact.
See your raw score and an estimated NBSTSA Certified Surgical Technologist score immediately after finishing each practice test.
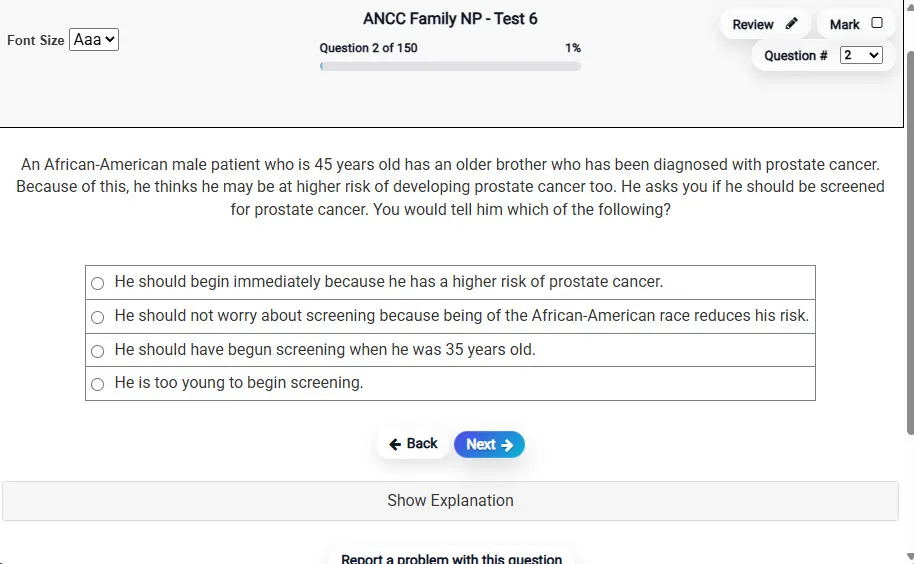
Review correct and incorrect answers with clear, step-by-step explanations so you truly understand each topic.
We're fully accredited by the Better Business Bureau and uphold the highest standards of trust and transparency.
No software to install. Access your NBSTSA CST practice exams 24/7 from any computer or mobile device.
Need extra help? Our specialized tutors are highly qualified and ready to support your NBSTSA exam prep.
Preparing for your upcoming NBSTSA Certified Surgical Technologist (CST) Certification Exam can feel overwhelming — but the right practice makes all the difference. Exam Edge gives you the tools, structure, and confidence to pass on your first try. Our online practice exams are built to match the real NBSTSA CST exam in content, format, and difficulty.
These NBSTSA Certified Surgical Technologist practice exams are designed to simulate the real testing experience by matching question types, timing, and difficulty level. This approach helps you get comfortable not just with the exam content, but also with the testing environment, so you walk into your exam day focused and confident.
Here is a list of alternative names used for this exam.