This is the content of the pop-over!

DANB's CPFDA (CPFDA) Practice Tests & Test Prep by Exam Edge


DANB's Certified Preventive Functions Dental Assistant  product image
(4.5)
Based on 28 Reviews

  • Real Exam Simulation: Timed questions and matching content build comfort for your DANB's CPFDA test day.
  • Instant, 24/7 Access: Web-based DANB's Certified Preventive Functions Dental Assistant practice exams with no software needed.
  • Clear Explanations: Step-by-step answers and explanations for your DANB's exam to strengthen understanding.
  • Boosted Confidence: Reduces anxiety and improves test-taking skills to ace your DANB's Certified Preventive Functions Dental Assistant (CPFDA).

Featured on

DANB's Certified Preventive Functions Dental Assistant Online Practice Test Bundles

BEST VALUE
15 practice tests

$149.25

$599.25

SAVE $450

Only $9.95 per test!

  • 100% Pass Guarantee
  • 15 online practice tests
  • 100 questions per test
  • Bonus: 100 Flash Cards + Study Guide
  • Instant access
  • Detailed Explanations
  • Practice tests never expire
  • Timed, untimed, or study guide mode
MOST POPULAR
10 practice tests

$99.50

$399.50

SAVE $300

Only $9.95 per test!

  • 10 online practice tests
  • 100 questions per test
  • Bonus: 100 Flash Cards + Study Guide
  • Instant access
  • Detailed Explanations
  • Practice tests never expire
  • Timed, untimed, or study guide mode
5 practice tests

$69.75

$199.75

SAVE $130

Only $13.95 per test!

  • 5 online practice tests
  • 100 questions per test
  • Bonus: 100 Flash Cards
  • Instant access
  • Detailed Explanations
  • Practice tests never expire
  • Timed, untimed, or study guide mode
1 practice test

$39.95

  • 1 online practice test
  • 100 questions per test
  • Instant access
  • Detailed Explanations
  • Practice tests never expire
  • Timed, untimed, or study guide mode
Quick Select
Tap to choose a bundle

** All Prices are in US Dollars (USD) **


DANB's CPFDA (CPFDA) Resources

Jump to the section you need most.

Understanding the exact breakdown of the DANB's Certified Preventive Functions Dental Assistant test will help you know what to expect and how to most effectively prepare. The DANB's Certified Preventive Functions Dental Assistant has multiple-choice questions . The exam will be broken down into the sections below:

DANB's Certified Preventive Functions Dental Assistant Exam Blueprint
Domain Name % Number of
Questions
Coronal Polish  
     Dental And Oral Anatomy 8% 2
     Oral Prophylaxis 7% 2
     Objective Of Coronal Polish 7% 2
     Dental Deposits 15% 4
     Polishing Precautions 15% 4
     Patient Education And Recordkeeping 10% 3
     Abrasives And Polishing Agents 8% 2
     Polishing Technique 20% 5
     Infection Control/OSHA Protocol 10% 3
Sealants  
     Purpose Of Sealants 10% 3
     Indications And Contraindications For Sealant Application 40% 10
     Acid Etching 10% 3
     Sealants 40% 10
Topical Anesthetic  
     Patient Preparation 10% 3
     Classifications 20% 5
     Precautions And Contraindications 20% 5
     Indications For Use 30% 8
     Placement Of The Topical Anesthetic (including Infection Control/OSHA Protocol 20% 5
Topical Fluoride  
     Basic Information About Fluoride 10% 3
     Indications And Contraindications For Topical Fluoride 30% 8
     Benefits Of Topical Fluoride 15% 4
     Topical Fluoride Application 15% 4
     Fluoride Preparations 10% 3
     Adverse Reactions 10% 3
     Patient Education 10% 3

DANB's Certified Preventive Functions Dental Assistant Study Tips by Domain

  • Coronal polish is a selective stain-removal procedure on clinical crowns; red flag: polishing is not a substitute for scaling and does not remove calculus.
  • Polish only after deposits are removed and tissues evaluated; common trap: polishing first can burnish plaque/stain into enamel and make debridement harder.
  • Avoid polishing demineralized/white-spot areas and new restorative margins; contraindication cue: if enamel looks chalky or rough, skip that surface and alert the dentist/hygienist.
  • Use the least abrasive agent that achieves stain removal; priority rule: heavy stain may require a coarser grit first, but always finish with a finer grit to reduce surface roughness.
  • Control heat with light intermittent pressure and adequate moisture; red flag: prolonged pressure in one spot can cause patient sensitivity or pulpal irritation.
  • Follow with thorough rinse and floss/inspect interproximals; common trap: leaving abrasive paste interproximally can irritate gingiva and skew the final assessment.
  • Know tooth notation systems (Universal, Palmer, FDI) and be able to translate quickly; common trap: mixing up Universal #8 with FDI 11 (both maxillary right central incisor).
  • Differentiate primary vs permanent dentition by count and morphology (primary 20, permanent 32); red flag: confusing primary molars (no premolars in primary dentition) with permanent premolars.
  • Identify tooth surfaces and line angles (mesial/distal, facial/lingual, occlusal/incisal) for charting and instructions; common trap: calling the facial surface “buccal” on anterior teeth (it’s “labial”).
  • Recognize basic crown/root anatomy (enamel, dentin, cementum, pulp) and the CEJ landmark; priority rule: avoid aggressive instrumentation/polishing at the CEJ where cementum/dentin are thin and easily abraded.
  • Localize gingival and periodontal structures (free gingiva, attached gingiva, mucogingival junction, sulcus); red flag: assuming bleeding is “normal” — it’s a sign of inflammation and should be documented.
  • Map salivary glands and duct openings relevant to moisture control (parotid/Stensen’s near maxillary molars; submandibular/Wharton’s at lingual frenum); common trap: placing cotton rolls without accounting for duct flow leading to persistent contamination.
  • In <BR>Oral Prophylaxis, focus on removal of plaque, calculus, and extrinsic stain to reduce gingival inflammation—red flag: visible supragingival calculus and bleeding on gentle probing indicate incomplete biofilm removal.
  • Use a systematic sequence (e.g., quadrant-by-quadrant, facial then lingual) and maintain fulcrum control—common trap: skipping distal surfaces of molars and lingual of mandibular anteriors where deposits commonly remain.
  • Recognize deposit types before instrument selection—priority rule: hard, tenacious calculus requires appropriate scaling instrumentation, while soft plaque is best disrupted with brushing/flossing and polishing cannot substitute.
  • Monitor patient comfort and tissues throughout the procedure—red flag: persistent pain, tissue tearing, or excessive bleeding suggests improper angulation/pressure and should prompt immediate technique correction.
  • Apply infection-control standards during all patient contact (PPE, instrument handling, and operatory barriers)—common trap: touching light handles or charts with contaminated gloves, creating a cross-contamination event.
  • Document findings and services provided (deposit level, bleeding/inflammation noted, patient tolerance, and education given)—priority rule: if abnormal findings are observed, record specifics and alert the dentist per office protocol.
  • Remove extrinsic stain and soft plaque from clinical crowns to improve esthetics and allow better visual inspection—red flag: coronal polish is not a substitute for scaling or root planing.
  • Create a smooth tooth surface that is less retentive for plaque and stains—common trap: leaving a rough surface by using an abrasive paste on exposed root dentin.
  • Enhance patient comfort and motivation by making teeth feel cleaner—priority rule: manage expectations that polishing will not lighten intrinsic discoloration or existing restorations.
  • Support preventive care by facilitating plaque control instruction on clean, visible surfaces—red flag: polishing before disclosing can mask where plaque was accumulating.
  • Prepare tooth surfaces when indicated for procedures that benefit from a clean field—common trap: polishing immediately before sealant placement can leave residual paste that interferes with bonding if not thoroughly rinsed.
  • Maintain tooth structure by using selective polishing only when clinically indicated—threshold cue: avoid routine full-mouth polishing at every visit due to cumulative enamel and dentin abrasion risk.
  • Differentiate deposits by attachment: plaque is soft and removable, calculus is mineralized and tenacious—common trap is calling all “white stuff” calculus.
  • Know where deposits form: supragingival calculus is common near salivary ducts (maxillary molar buccal, mandibular anterior lingual)—red flag sites should be checked before polishing.
  • Recognize plaque maturity: newly formed plaque is less organized; mature plaque harbors more pathogenic flora—priority rule is to identify heavy plaque before selecting polishing abrasiveness.
  • Identify extrinsic stains (tobacco, coffee/tea, chlorhexidine, metal salts) versus intrinsic discoloration—common trap is expecting polishing to remove intrinsic stain.
  • Understand plaque retention factors (overhangs, rough restorations, orthodontic appliances, xerostomia)—red flag is recurrent deposits at the same site indicating a local factor to document.
  • Assess calculus implications: calculus is a plaque-retentive surface linked to gingival inflammation, but it cannot be removed by polishing alone—contraindication cue is to avoid aggressive polishing over heavy calculus and notify the dentist/hygienist.
  • Confirm indications before polishing: do not polish if the goal is plaque removal, and delay if there is heavy calculus present—scaling must be completed first (common trap: using polish as a substitute for debridement).
  • Screen for contraindications such as respiratory disease/asthma, gag reflex issues, or latex allergy with rubber cup products; use alternatives or modify technique—red flag: patient coughs or wheezes with paste aerosol.
  • Avoid polishing exposed root surfaces, demineralized areas, newly erupted teeth, or restorations with rough margins—priority rule: preserve tooth structure and avoid creating additional abrasion.
  • Use the least abrasive paste needed; coarse grit is for heavy extrinsic stain only and should be time-limited—common trap: defaulting to coarse paste on every patient.
  • Prevent heat and tissue trauma: light pressure, intermittent contact, and adequate paste on the cup; stop if the patient reports sensitivity or if gingiva blanches—red flag for excessive pressure.
  • Control splatter and ingestion: use high-volume evacuation, proper fulcrum, and minimal prophy angle speed; contraindication cue: avoid aerosol-heavy polishing when infection control policies require reduced aerosol generation.
  • Document patient education in the chart with the specific topic(s) covered, method used (verbal/demo/written), and patient response; red flag: charting “OHI given” with no details is commonly considered incomplete.
  • Record all preventive agents and materials with name, concentration/strength, tooth/arch surfaces, and contact time as applicable; common trap: failing to note fluoride varnish percentage or sealant tooth numbers.
  • Include informed consent/assent and any refusal (and why) in the record, plus who provided the authorization; priority rule: refusals must be charted with the education provided and planned follow-up.
  • Update and verify health history and allergies at each visit and document changes before providing preventive services; red flag: proceeding with products containing colophony/rosin or flavorings without noting allergy screening.
  • Provide and document post-op/home-care instructions (e.g., varnish eating/brushing restrictions, sealant care, desensitizing expectations) and when to seek care; common trap: giving verbal instructions but not recording them.
  • Ensure entries are dated, timed if required by policy, and attributed to the correct provider with credentials/initials; red flag: late entries without clear “late entry” notation and reason can create compliance issues.
  • Select the least abrasive agent that will accomplish stain removal—red flag: using coarse grit or heavy pressure can remove enamel/cementum, especially on exposed roots.
  • Match the polishing agent to the stain type: fine paste for light extrinsic stain and coarser only when needed—common trap: starting with coarse paste instead of stepping down to finer grit.
  • Verify the agent’s ingredients for contraindications—priority rule: avoid abrasive pastes with acidic additives on demineralized areas or erosion because abrasion is accelerated.
  • Use tin oxide as a high-luster, low-abrasion option after stain removal—red flag: relying on tin oxide alone to remove heavy stain wastes time and encourages over-polishing.
  • Consider nonabrasive polishing agents (e.g., glycerin-based or aluminum oxide in some systems) when enamel is compromised—common trap: polishing newly erupted teeth or hypoplastic enamel with standard grit.
  • Control splatter and contamination by dispensing single-use portions of paste and avoiding “double dipping”—OSHA/infection-control cue: shared bulk jars can become contaminated and must not contact the prophy angle.
  • Use the least abrasive method that will remove extrinsic stain—select a fine paste and slow speed first; red flag: aggressive grit/speed can remove enamel and cementum.
  • Maintain a light, steady “patting” pressure with a rubber cup so the rim flares and stays on the tooth; common trap: excessive pressure generates heat and causes patient discomfort.
  • Keep the cup constantly moving and limit contact to a few seconds per tooth surface; priority rule: intermittent strokes plus frequent paste replenishment reduce friction and heat.
  • Adapt the cup to the cervical third and interproximal areas by angling the handpiece and rolling the cup into embrasures; red flag: lingering at the CEJ can damage exposed root surfaces.
  • For heavy stain in pits and fissures, use a bristle brush or pointed cup briefly and only where indicated; contraindication cue: avoid bristle brushes on exposed root surfaces or around demineralized areas.
  • Rinse and evaluate as you go—reapply paste only where stain remains; common trap: polishing every surface out of habit instead of targeting stain, which increases unnecessary abrasion.
  • Follow Standard Precautions for every patient; red flag: changing gloves without hand hygiene still violates OSHA expectations.
  • Use appropriate PPE (mask, eyewear/face shield, gloves, protective clothing) and change it when contaminated; common trap: wearing the same mask between patients once it becomes damp.
  • Assume all instruments are contaminated until processed—clean, package, sterilize, and document each load; priority rule: do not use any item if the sterilizer indicator or monitoring result is questionable.
  • Maintain sharps safety (no two-handed recapping; use a one-handed scoop or safety device) and dispose in puncture-resistant containers; red flag: overfilling the sharps container past the fill line.
  • Implement exposure control steps immediately after a bloodborne incident (wash/flush, report, document, seek evaluation); common trap: delaying reporting because the exposure seems “minor.”
  • Disinfect clinical contact surfaces between patients using an EPA-registered disinfectant with correct contact time; priority rule: surfaces must stay visibly wet for the full label time or the disinfection is not valid.
  • Sealants are low-viscosity resin (or glass ionomer) materials placed in pits and fissures to create a physical barrier against caries—red flag: do not place over suspected occlusal decay without the dentist’s evaluation.
  • Moisture control is the make-or-break factor for sealant success—common trap: saliva contamination after etch can cause early loss, so re-etch (per office protocol) and re-isolate if contamination occurs.
  • Proper field preparation includes cleaning debris from pits/fissures without leaving oily residue—priority rule: avoid prophy pastes with oils/fluoride immediately before etching unless the product/protocol specifically allows it.
  • After placement, verify complete coverage and marginal integrity with an explorer and adjust occlusion as indicated—red flag: a high spot left unadjusted can cause post-op discomfort or sealant fracture.
  • Light-cured sealants require correct curing light positioning, time, and tip cleanliness—common trap: a weak light or holding the tip too far away leads to undercure and premature failure.
  • Document tooth/teeth sealed, material type, etch/bond use, isolation method, curing time, and post-op instructions—priority rule: chart sealant retention at recall and reapply if partial loss is detected.
  • Sealants are placed to physically block pits and fissures, preventing biofilm retention and reducing occlusal caries risk—priority is newly erupted molars/premolars with deep fissures.
  • The goal is caries prevention, not restoration; a common trap is trying to use sealant to “fix” cavitated lesions that need restorative care.
  • Sealants help arrest or slow noncavitated enamel lesions by cutting off nutrient access—red flag: visible cavitation or radiographic dentin involvement.
  • They are most effective on occlusal surfaces where brushing and fluoride have limited access—priority rule: seal first molars early (soon after eruption) to prevent first-time decay.
  • Sealants reduce the need for future operative treatment and can be part of a risk-based prevention plan—common trap: skipping sealants solely because a patient is older if fissures remain caries-prone.
  • Longevity depends on retention and maintenance; practical cue: schedule periodic checks and repair/replace promptly if partial loss is detected.
  • Indication: newly erupted permanent molars/premolars with deep pits and fissures, especially within the first 2–4 years post-eruption; priority rule—seal high-caries-risk patients first.
  • Indication: noncavitated incipient occlusal lesions confined to enamel may be sealed to arrest progression; red flag—frank cavitation or dentin involvement needs restorative care, not a sealant.
  • Contraindication: inability to isolate and keep the tooth dry (saliva contamination); common trap—trying to seal a partially erupted molar with gingival operculum without adequate isolation.
  • Contraindication: open proximal contacts with suspected interproximal decay or radiographic evidence of caries; cue—check bitewings before sealing when caries risk is high.
  • Contraindication/limited benefit: shallow, self-cleansing fissure anatomy with low caries risk; threshold cue—if the explorer does not catch and the fissure is wide, sealant may be unnecessary.
  • Clinical caution: poor patient cooperation (movement, gagging) increases contamination and failure; priority rule—delay, use behavior management, or select an interim approach rather than placing a compromised sealant.
  • Verify the tooth is fully erupted and the surface is clean, dry, and isolated before etching—saliva contamination after etch is a common trap that forces re-etching.
  • Apply etchant only to intended enamel (and dentin only if directed) and avoid soft tissue contact; a red flag is a patient reporting a burning sensation from acid on gingiva.
  • Follow manufacturer time limits (typically shorter for primary teeth and longer for uncut enamel); over-etching can weaken the surface and reduce bond strength.
  • Rinse thoroughly for the recommended duration and evacuate well; a priority rule is to remove all gel residue because leftover etchant can compromise sealant retention.
  • Dry and inspect the etched enamel for a uniform “frosty/chalky” appearance; a glossy or uneven look is a red flag for contamination or under-etch and requires corrective steps.
  • Maintain isolation until sealant/resin is placed and cured; a common trap is allowing moisture during transfer, so use high-volume evacuation and cotton roll/dry-angle replacement as needed.
  • Use sealants to prevent occlusal caries by sealing pits and fissures on newly erupted permanent molars/premolars; priority rule: select teeth with deep fissures and early noncavitated lesions rather than obvious cavitation.
  • Isolation is critical because resin sealants fail with saliva contamination; red flag: if the etched surface gets wet or looks glossy instead of “frosty,” re-etch and rinse/dry before proceeding.
  • Follow the sequence — clean/debride, etch, rinse, dry, apply sealant, cure, evaluate — and avoid overfilling; common trap: excess material left in the groove pattern can create a high spot and discomfort.
  • Verify curing with the correct light tip distance and exposure time; red flag: a tacky surface after curing suggests inadequate light output or time and requires additional curing (or removal and replacement if uncured beneath).
  • After placement, check occlusion with articulating paper and adjust if needed; contraindication cue: do not leave a high occlusion on a newly sealed molar because it can cause pain and lead to premature loss of the sealant.
  • Assess retention at recall visits and repair promptly; common trap: assuming a partially lost sealant still protects — any missing segment is a caries risk and should be re-isolated and resealed.
  • Select topical anesthetic by allergy history and medical status—red flag: a reported “caine” allergy or severe sulfa sensitivity warrants clarification and likely avoidance of certain formulations.
  • Use the lowest effective amount and limit surface area—common trap: overapplying on multiple sites increases risk of local anesthetic systemic toxicity (e.g., dizziness, tinnitus, metallic taste).
  • Dry and isolate mucosa before application for best effect—priority rule: moisture dilution leads to failure and tempts unsafe reapplication.
  • Watch timing and tissue response—red flag: blanching, ulceration, or sloughing can indicate chemical burn from prolonged contact, especially under cotton rolls.
  • Prevent ingestion and aspiration—common trap: spraying toward the oropharynx can trigger gagging or numb the throat, increasing aspiration risk.
  • Provide brief safety instructions after use—priority rule: warn patients (especially children) not to chew numb lips/cheeks to avoid self-inflicted soft-tissue trauma.
  • Confirm patient identity, medical history, medications, allergies, and current pregnancy/breastfeeding status; red flag: history of latex allergy requires non-latex supplies before setup.
  • Review vitals and chief concern and ask about asthma/COPD or gag reflex; common trap: skipping inhaler availability and then triggering an avoidable respiratory event during chair positioning.
  • Explain the procedure in plain language and obtain informed consent per office policy/state rules; priority rule: never proceed if the patient cannot understand/agree (e.g., needs interpreter/guardian signature).
  • Position the patient and adjust headrest/light for access while maintaining comfort; red flag: supine positioning may be contraindicated for severe reflux, vertigo, late pregnancy, or breathing difficulty.
  • Place protective barriers (eyewear, bib) and pre-procedural rinse if indicated; common trap: forgetting patient eyewear before using pumice or air/water spray, increasing injury risk.
  • Inspect oral tissues and note ulcerations, bleeding, loose teeth/restorations, or orthodontic appliances before starting; priority rule: document and alert the dentist if findings could change the planned preventive procedure.
  • Classify tooth surfaces correctly (occlusal, buccal/facial, lingual, mesial, distal) before documenting procedures—common trap: mixing up mesial vs distal when the patient is reclined.
  • Know dentition classifications (primary, mixed, permanent) and the typical eruption timing cues—red flag: placing preventive materials without confirming the tooth is fully erupted and isolatable.
  • Differentiate cavity classifications (Class I–V) by surface location—priority rule: pits and fissures on occlusal/lingual surfaces are Class I, not Class II.
  • Recognize fluorides by classification (systemic vs topical; varnish/gel/foam/rinse) and what the label implies—common trap: assuming all topical products use the same application time or dose.
  • Classify sealants by material type (resin-based vs glass ionomer) and setting mechanism—contraindication cue: choose a moisture-tolerant option when isolation is compromised.
  • Classify abrasives and polishing agents by abrasivity and intended use—red flag: using coarse paste on exposed root surfaces, which can increase sensitivity and abrasion.
  • Do not perform coronal polishing on teeth with heavy calculus or active periodontal inflammation—remove deposits first, as polishing over calculus is a common trap that leaves plaque-retentive ledges.
  • Avoid polishing on newly erupted teeth or demineralized/white-spot areas—these surfaces are not fully mineralized, and a red flag is visible enamel decalcification or hypoplasia.
  • Use caution or avoid polishing on exposed dentin/cementum and root caries—abrasives can remove root surface and increase sensitivity, especially with gingival recession.
  • Do not use abrasive polishing pastes on teeth with esthetic restorations (e.g., composites, porcelain, gold) unless indicated—a priority rule is to select the least abrasive option to prevent scratching and loss of luster.
  • Use caution with patients who have respiratory compromise (e.g., asthma/COPD) because aerosolized paste and pumice can trigger symptoms—red flag: patient reports wheezing or shortness of breath during treatment.
  • Contraindications include allergy or sensitivity to paste ingredients (flavoring, fluoride, latex from prophy angles if applicable)—common trap is not verifying product components before use.
  • Use sealants primarily on pit-and-fissure surfaces of newly erupted permanent molars/premolars when the patient is at moderate-to-high caries risk; red flag: saliva contamination during eruption makes isolation difficult and increases failure risk.
  • Indicate topical fluoride for patients with active caries, xerostomia, orthodontic appliances, exposed root surfaces, or high sugar/poor home care; priority rule: high-risk status drives product strength and recall frequency.
  • Indicate coronal polishing only to remove extrinsic stain and soft plaque before procedures (e.g., fluoride/sealants) when deposits are minimal; common trap: polishing is not a substitute for scaling or routine “every visit” treatment.
  • Indicate topical anesthetic to reduce gag reflex or discomfort from instrumentation/impressions; red flag: avoid “double-dosing” when another local anesthetic will be used soon after.
  • Indicate acid etching when bonding sealants/resin materials to enamel; practical cue: etch should be applied only to clean, dry enamel—any moisture requires re-etch per manufacturer instructions.
  • Indicate adjunctive patient education whenever preventive services are provided; common trap: failure to document indication (risk level, surfaces treated, product/lot) can be scored as incomplete recordkeeping.
  • Verify the patient’s medical history and allergies (especially ester vs amide local/topical agents) before dispensing; red flag: prior “lidocaine” allergy or history of methemoglobinemia risk with benzocaine.
  • Use standard precautions and OSHA-aligned practices—hand hygiene, PPE, and proper operatory barrier protection; common trap: touching drawer handles or light handles with contaminated gloves.
  • Use single-use applicators and dispense only what is needed into a dappen dish; red flag: double-dipping an applicator into the original container (cross-contamination).
  • Dry and isolate the mucosa (cotton rolls/gauze, saliva ejector) before placement; priority rule: topical anesthetic is less effective on wet tissue and can be swallowed, increasing systemic exposure.
  • Apply a thin film to the target tissue for the manufacturer’s recommended contact time; common trap: overapplication or spreading to unintended areas, leading to numb lips/cheeks and post-op biting.
  • After use, discard disposables in appropriate waste, disinfect reusable items, and document agent, location, and time; red flag: any rash, swelling, wheeze, or cyanosis requires stopping the procedure and activating emergency response per office protocol.
  • Select the correct topical fluoride form (varnish, gel/foam, rinse) based on caries risk and cooperation—common trap: using high-concentration gel in patients who can’t reliably expectorate.
  • Screen for contraindications and precautions before application (e.g., allergy to colophony/rosin in some varnishes, severe gag reflex)—red flag: history of hypersensitivity reactions after dental products.
  • Prevent ingestion by using proper isolation, minimal amount, and suction—priority rule: never leave trays unattended, especially with children or special-needs patients.
  • Follow post-op instructions exactly to maximize uptake—common trap: telling varnish patients to brush/floss immediately; instead delay per product directions and advise soft foods if required.
  • Document the product name, concentration, lot/expiration, site/method, and patient tolerance—red flag: missing lot/expiration can compromise adverse-event follow-up and compliance.
  • Manage adverse reactions promptly: stop the procedure, remove fluoride as feasible, assess airway, and activate emergency protocol if symptoms escalate—contraindication cue: any signs of anaphylaxis require immediate EMS response.
  • Fluoride works mainly by enhancing remineralization and inhibiting demineralization; it is most effective with frequent low-dose exposure—red flag: assuming one strong treatment replaces daily fluoride toothpaste use.
  • Systemic vs topical: systemic fluoride (ingested) affects developing teeth, while topical fluoride acts on erupted enamel; common trap: confusing community water fluoridation benefits with in-office topical fluoride indications.
  • Know key terms: ppm (parts per million) is the unit for fluoride concentration (e.g., water levels are in ppm); priority rule: don’t mix up % fluoride with % compound (e.g., NaF vs fluoride ion).
  • Mechanism detail: fluoride can form fluorapatite-like surfaces and create calcium fluoride reservoirs after topical exposure; cue: low pH fluoride products increase uptake but can raise sensitivity/irritation risk.
  • Fluoride toxicity basics: acute toxicity risk increases with dose relative to body weight; red flag: child access to toothpaste/gel—know that nausea/vomiting after ingestion warrants immediate action per office protocol and poison control guidance.
  • Fluorosis is a developmental enamel change from excessive fluoride during tooth formation (not from topical fluoride on erupted teeth); common trap: attributing fluorosis in teens/adults to recent professional fluoride applications.
  • Recommend topical fluoride for patients with elevated caries risk (e.g., new/recurrent caries, orthodontic appliances, exposed root surfaces, xerostomia, poor plaque control)—priority rule: risk-based selection, not “routine for everyone.”
  • Use topical fluoride to help reduce demineralization/white-spot lesions and sensitivity on exposed dentin/cementum—common trap: confusing topical fluoride’s role (surface remineralization) with systemic fluoride benefits.
  • Contraindication: known allergy/sensitivity to product ingredients (e.g., colophony/rosin in some varnishes, flavorings)—red flag: history of hives, wheeze, or dermatitis after dental products.
  • Use caution or defer if the patient cannot adequately control swallowing or cooperate (very young, special needs without reliable control)—priority rule: choose varnish (lower ingestion risk) or postpone rather than apply gel/foam in trays.
  • Avoid applying immediately after ingestion of high-fluoride products (recent fluoride rinse, supplements) when overdose risk is a concern—red flag: nausea/abdominal pain shortly after fluoride exposure.
  • Do not place topical fluoride over areas requiring diagnosis or treatment first (e.g., suspected ulceration, uninvestigated lesions, gross decay needing restorative care)—common trap: using fluoride as a substitute for addressing active disease.
  • Topical fluoride promotes remineralization by driving fluoride into early enamel lesions (white-spot areas) to form a more acid-resistant surface—priority: treat incipient lesions rather than waiting for cavitation.
  • It inhibits demineralization by reducing enamel solubility during acid attacks—common trap: assuming fluoride “repairs” a cavitated lesion (it doesn’t).
  • Fluoride has an antibacterial effect in plaque, interfering with bacterial metabolism and lowering acid production—red flag: high caries-risk patients need consistent exposure, not one-off application.
  • It can reduce root caries by strengthening exposed cementum/dentin and aiding remineralization—priority rule: older adults with recession benefit from frequent topical fluoride.
  • Topical fluoride helps reduce tooth sensitivity by occluding dentinal tubules or enhancing mineral deposition—cue: sensitivity relief is often greatest with varnish or repeated applications.
  • Fluoride lowers overall caries incidence when combined with risk-based recall and home-care reinforcement—common trap: overlooking diet and hygiene counseling because fluoride was applied.
  • Verify the correct fluoride form and concentration (varnish vs gel/foam) and follow manufacturer’s dwell time — a common trap is using a tray time meant for gel when applying varnish.
  • Screen for contraindications before setup (e.g., colophony/rosin allergy for many varnishes) — red flag: history of allergic reaction to sticking-plaster/adhesives or pine/resin products.
  • Perform pre-op steps to maximize uptake: remove gross plaque, isolate, and dry teeth — priority rule: moisture contamination reduces effectiveness, especially for gel/foam tray applications.
  • Apply using correct delivery: thin varnish layer to all surfaces or properly loaded trays for gel/foam without overfilling — common trap: excess material increases gagging/swallowing risk.
  • Maintain infection control throughout (PPE, clean/covered applicators, avoid re-dipping brushes) — red flag: double-dipping into a varnish well is considered cross-contamination.
  • Give and document post-op instructions immediately (no eating/drinking for the specified period; avoid brushing/flossing for varnish per product directions) — common trap: omitting aftercare leads to premature removal and reduced benefit.
  • Know the common in-office topical fluoride forms: 5% NaF varnish (22,600 ppm), APF gel/foam 1.23% (12,300 ppm), and neutral NaF gel 2% (9,000 ppm)—ppm mix-ups are a frequent exam trap.
  • Match preparation to restoration risk: avoid APF products around porcelain/composites/glass ionomer and choose neutral NaF instead—APF can etch and dull these materials.
  • Fluoride varnish is a resin-based set-on-contact product applied in a thin layer—red flag: overloading the brush increases ingestion risk and wastes material.
  • Tray-applied gels/foams require correct tray size and minimal product (typically a thin ribbon)—common trap: overfilled trays increase gagging and swallowing.
  • OTC preparations include toothpastes and rinses; prescription home-use typically includes high-fluoride toothpaste (e.g., 5,000 ppm) or gels—priority rule: verify patient age/caries risk before recommending high-concentration home products.
  • Storage/handling matters: keep products labeled, capped, and within expiration dates—red flag: using expired or contaminated fluoride can reduce effectiveness and violates standard infection-control expectations.
  • Recognize true allergy vs. expected effects—urticaria, wheeze, facial swelling, or hypotension after topical anesthetic is a red-flag emergency, not a “normal reaction.”
  • Topical fluoride can cause nausea/vomiting if swallowed; common trap: failing to use suction and then dismissing GI upset as anxiety.
  • Latex sensitivity may present as localized rash/itching (contact dermatitis) or rapid respiratory symptoms (Type I); priority rule: stop exposure immediately and switch to non-latex supplies.
  • Etchants, pumice, and prophylaxis materials can cause chemical/abrasive tissue irritation; red flag: persistent burning or sloughing indicates the material contacted soft tissue too long.
  • Vasoconstrictor-containing anesthetics can trigger palpitations, tremor, or anxiety-like symptoms; common trap: mistaking epinephrine reaction for allergy and failing to document it accurately.
  • Know immediate response steps—discontinue the agent, assess airway/breathing/circulation, and activate emergency protocol when systemic signs appear; contraindication: do not continue treatment after a suspected anaphylactic reaction.
  • Explain the procedure in plain language using a “tell-show-do” approach and confirm understanding with teach-back; red flag: patient nods yes but cannot repeat key points.
  • Set expectations for normal sensations (taste, vibration, pressure) and expected duration; common trap: failing to warn that grit or taste is normal leads to anxiety and sudden movement.
  • Give clear behavior instructions during treatment (raise hand to stop, breathe through nose, avoid tongue on working area); priority rule: stop immediately if the patient signals distress.
  • Review medical history highlights that affect preventive care (asthma/inhaler use, gag reflex, allergies, pregnancy, xerostomia); red flag: latex or flavoring sensitivity not disclosed until symptoms appear.
  • Provide home-care guidance tied to the day’s services (brushing/flossing technique, diet/sugar frequency, sensitivity management) with one specific goal; common trap: giving too many changes at once reduces adherence.
  • Discuss risk-based recall and when to call the office (persistent pain, swelling, rash, difficulty breathing); contraindication cue: any breathing difficulty after a product exposure is an emergency, not a “wait and see.”


Built to Fit Into Your Busy Life

Everything you need to prepare with confidence—without wasting a minute.

Three Study Modes

Timed, No Time Limit, or Explanation mode.

Actionable Analytics

Heatmaps and scaled scores highlight weak areas.

High-Yield Rationales

Concise explanations emphasize key concepts.

Realistic Interface

Matches the feel of the actual exam environment.

Accessible by Design

Clean layout reduces cognitive load.

Anytime, Anywhere

Web-based access 24/7 on any device.
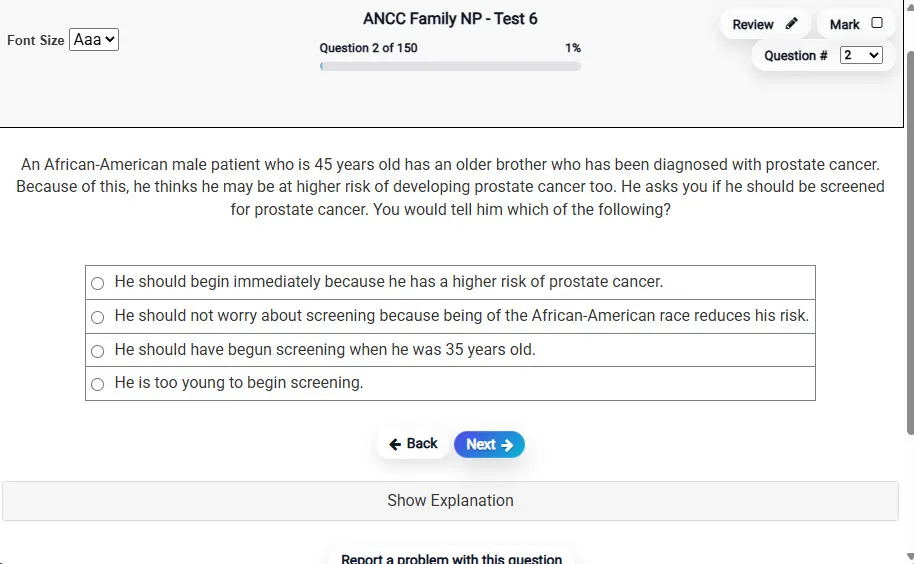
Answering a Question screen – Multiple-choice item view with navigation controls and progress tracker.
Answering a Question Multiple-choice item view with navigation controls and progress tracker.

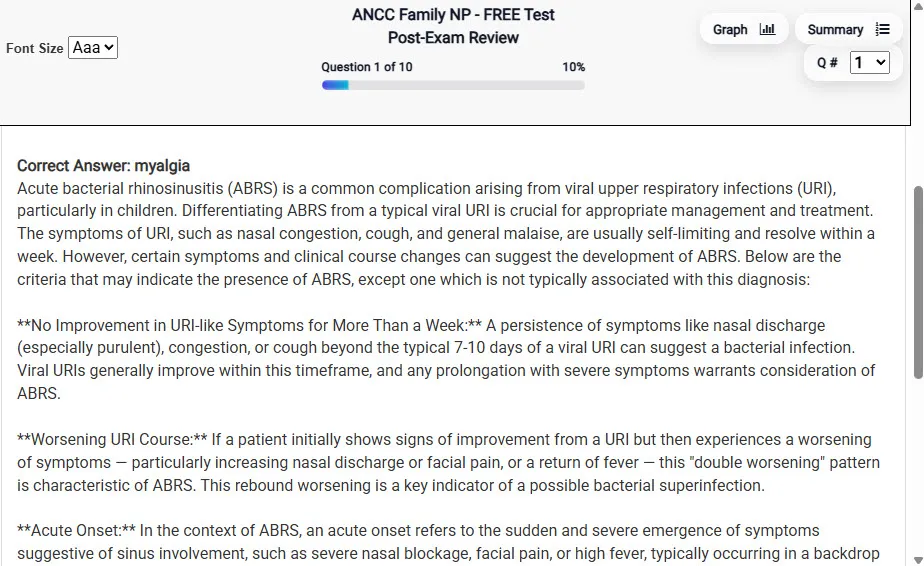
                           Detailed Explanation screen – 
                         Review mode showing chosen answer and rationale and references.
Detailed Explanation Review mode showing chosen answer and rationale and references.

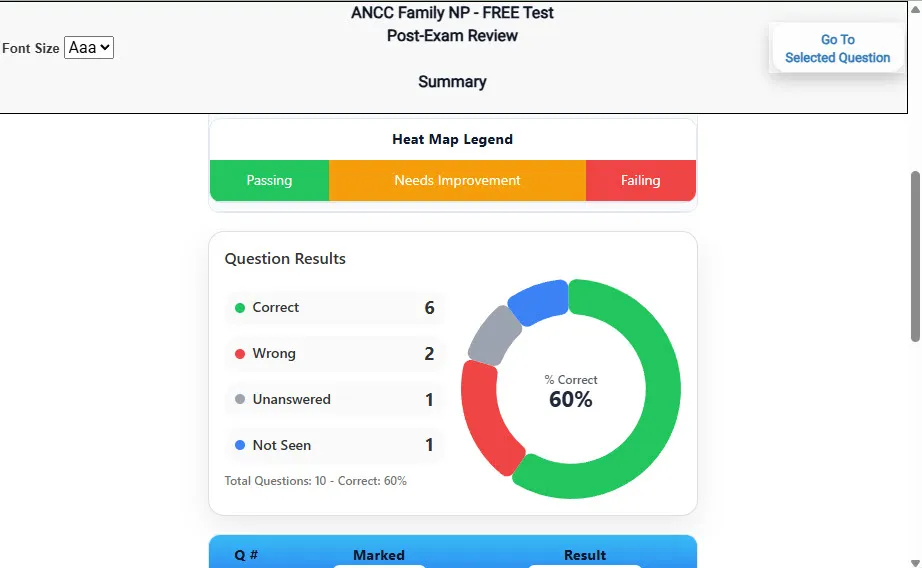
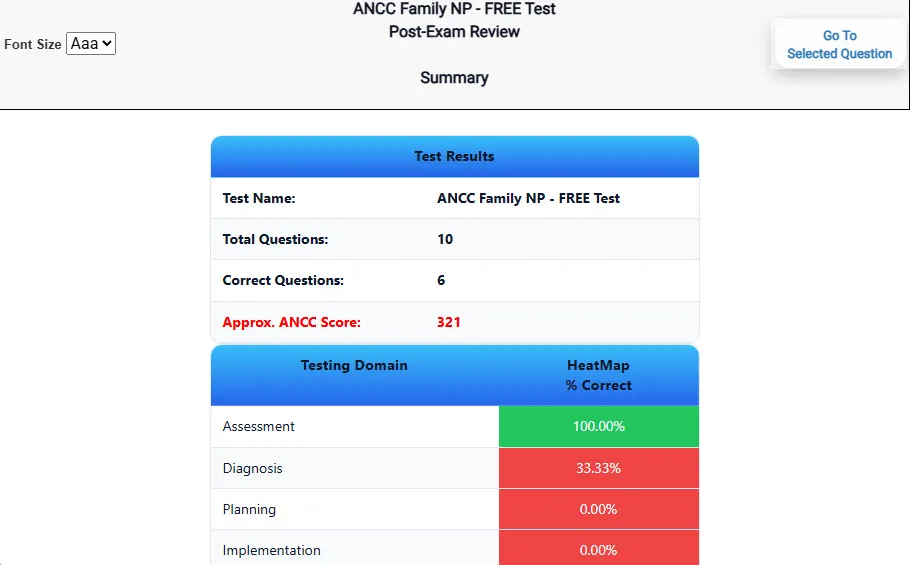
                           Review Summary 1 screen – 
                         Summary with counts for correct/wrong/unanswered and not seen items.
Review Summary 1 Summary with counts for correct/wrong/unanswered and not seen items.

                           Review Summary 2 screen – 
                         Advanced summary with category/domain breakdown and performance insights.
Review Summary 2 Advanced summary with category/domain breakdown and performance insights.

What Each Screen Shows

Answer Question Screen

  • Clean multiple-choice interface with progress bar.
  • Mark for review feature.
  • Matches real test pacing.

Detailed Explanation

  • Correct answer plus rationale.
  • Key concepts and guidelines highlighted.
  • Move between questions to fill knowledge gaps.

Review Summary 1

  • Overall results with total questions and scaled score.
  • Domain heatmap shows strengths and weaknesses.
  • Quick visual feedback on study priorities.

Review Summary 2

  • Chart of correct, wrong, unanswered, not seen.
  • Color-coded results for easy review.
  • Links back to missed items.

Top 10 Reasons to Use Exam Edge for your DANB's Certified Preventive Functions Dental Assistant Exam Prep

  1. Focused on the DANB's Certified Preventive Functions Dental Assistant Exam

    Our practice tests are built specifically for the DANB's CPFDA exam — every question mirrors the real topics, format, and difficulty so you're studying exactly what matters.

  2. Real Exam Simulation

    We match the per-question time limits and pressure of the actual DANB's exam, so test day feels familiar and stress-free.

  3. 15 Full Practice Tests & 1,500 Unique Questions

    You'll have more than enough material to master every DANB's CPFDA concept — no repeats, no fluff.

  4. Lower Cost Than a Retake

    Ordering 5 practice exams costs less than retaking the DANB's Certified Preventive Functions Dental Assistant exam after a failure. One low fee could save you both time and money.

  5. Flexible Testing

    Need to step away mid-exam? Pick up right where you left off — with your remaining time intact.

  6. Instant Scoring & Feedback

    See your raw score and an estimated DANB's Certified Preventive Functions Dental Assistant score immediately after finishing each practice test.

  7. Detailed Explanations for Every Question

    Review correct and incorrect answers with clear, step-by-step explanations so you truly understand each topic.

  8. Trusted & Accredited

    We're fully accredited by the Better Business Bureau and uphold the highest standards of trust and transparency.

  9. Web-Based & Always Available

    No software to install. Access your DANB's CPFDA practice exams 24/7 from any computer or mobile device.

  10. Expert Support When You Need It

    Need extra help? Our specialized tutors are highly qualified and ready to support your DANB's exam prep.


Pass the DANB's Certified Preventive Functions Dental Assistant Exam with Realistic Practice Tests from Exam Edge

Preparing for your upcoming DANB's Certified Preventive Functions Dental Assistant (CPFDA) Certification Exam can feel overwhelming — but the right practice makes all the difference. Exam Edge gives you the tools, structure, and confidence to pass on your first try. Our online practice exams are built to match the real DANB's CPFDA exam in content, format, and difficulty.

  • 📝 15 DANB's Certified Preventive Functions Dental Assistant Practice Tests: Access 15 full-length exams with 100 questions each, covering every major DANB's Certified Preventive Functions Dental Assistant topic in depth.
  • Instant Online Access: Start practicing right away — no software, no waiting.
  • 🧠 Step-by-Step Explanations: Understand the reasoning behind every correct answer so you can master DANB's CPFDA exam concepts.
  • 🔄 Retake Each Exam Up to 4 Times: Build knowledge through repetition and track your improvement over time.
  • 🌐 Web-Based & Available 24/7: Study anywhere, anytime, on any device.
  • 🧘 Boost Your Test-Day Confidence: Familiarity with the DANB's format reduces anxiety and helps you perform under pressure.

These DANB's Certified Preventive Functions Dental Assistant practice exams are designed to simulate the real testing experience by matching question types, timing, and difficulty level. This approach helps you get comfortable not just with the exam content, but also with the testing environment, so you walk into your exam day focused and confident.


Exam Edge DANB Reviews


Yesterday I passed my CDA test. Your test really helped me and I just wanted to say thank you.

Charisse, NY

I found the practice tests extremely helpful. I passed the DANB RHS exam and felt that the subject matter was thoroughly covered by your practice tests. The viewing of films and answering questions on them was especially helpful. Thank you very much for the assistance in preparing for the DANB RHS e ...
Read More
Rofiah, Turnersville NJ

Easy to purchase & easily accessible. Great tool to use

Kay , Milton, Indiana


DANB's Certified Preventive Functions Dental Assistant Aliases Test Name

Here is a list of alternative names used for this exam.

  • DANB's Certified Preventive Functions Dental Assistant
  • DANB's Certified Preventive Functions Dental Assistant test
  • DANB's Certified Preventive Functions Dental Assistant Certification Test
  • DANB's CPFDA test
  • DANB
  • DANB CPFDA
  • CPFDA test
  • DANB's Certified Preventive Functions Dental Assistant (CPFDA)
  • 's Certified Preventive Functions Dental Assistant certification